


Create a Docker Swarm cluster using Azure Container Service
25 Apr 2016 in Azure Container Service | Docker | Microsoft AzureMicrosoft has announced the general availability of Azure Container Service (ACS) that allows to deploy in an easy way a cluster of virtual machines that can host containers.
If you have not heard about Azure Container Service yet, you may want watch these videos first:
- Windows Server containers, Docker, and an introduction to Azure Container Service
- Deep dive on the Azure Container Service with Mesos
- Getting started developing with Docker and Azure Container Service
Azure Container Services supports two different orchestrators for the cluster
- Docker Swarm: It uses the native Docker stack so you can directly use Docker commands to deploy Docker containers.
- DC/OS: a datacenter operating system that can run containers in different formats, inluding Docker images. DC/OS is also used to deploy and run well known distributed systems like HDFS, Spark, Kafka, Cassandra… and is used at scale by organizations like AirBnb, Twitter, Netflix…
In this blog post, I will explain how you can use Azure Container Service to deploy in a few steps a Docker Swarm based cluster in Azure but if you want to deploy a DC/OS one, the procedure is very similar.
Generate an SSH RSA Key
Microsoft is working on the implementation of a container technology for the next version of Windows Server, but Azure Container Service supports only Linux workloads currently, so you will need an SSH key to connect the cluster once it is created. There are several ways to create a new key, depending on the system you are running on.
Because I am running Windows, I will detail the process to generate your key on this system. If you are running Linux on Mac and don’t know how to generate SSH keys, check this article on the GitHub documentation.
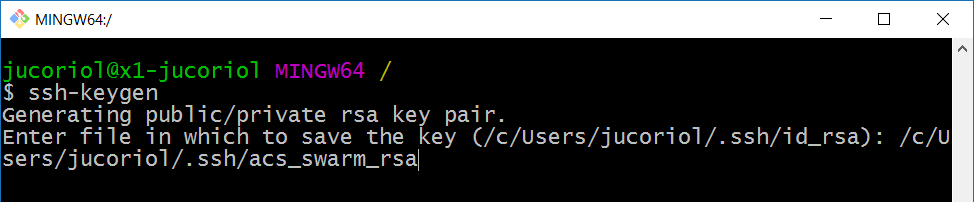
I have chosen to use the GitHub for Windows tools, because they are super easy to use. Once installed, just launch Git Bash, type ssh-keygen in the console and press Enter:

By default, ssh-keygen creates the public/private rsa key pair in a .ssh folder in your user’s profile root. The default name for these files are id_rsa (private) and id_rsa.pub (public) but you can choose to override by the name of your choice:
Press enter. You will be asked for a passphrase to protect your key.
Note: keep your passphrase in mind or somewhere secure, you will be asked for it when connecting to the cluster using SSH!
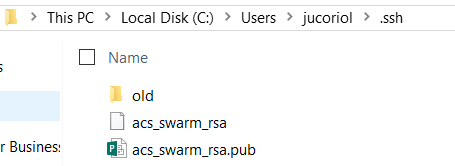
Once done, check the two files have been generated:
You are now ready to create your first cluster using Azure Container Service!
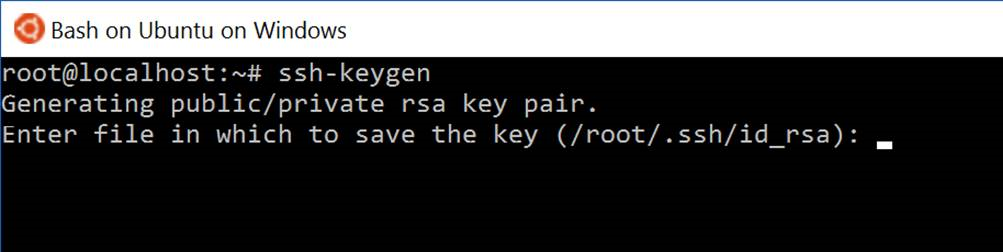
Note: if you are running the last Windows Insider version of Windows 10, you can now run Bash on Ubuntu on Windows ! So you don’t need to install GitHub for Windows. Just open a Bash shell and use the ssh tools directly:
Create a new Docker Swarm cluster on Azure Container Service
You can create a new Azure Container Service instance using the Azure portal, Azure CLI or PowerShell. In this blog post, I will focus on the Azure Portal.
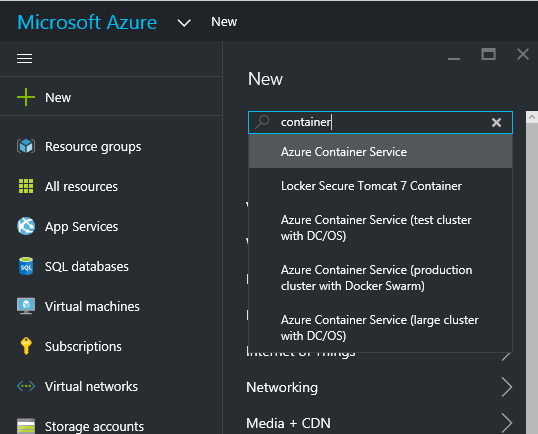
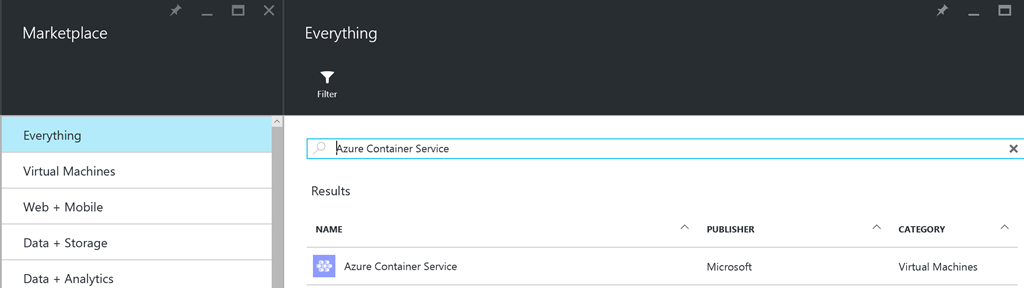
Go to http://portal.azure.com and log in with your Azure Account. Click the + New button and search for “container”:
Click on Azure Container Service. In the results view, click on the Azure Container Service line:
Then, click on the Create button. An assistant will open to help you to configure your new cluster.
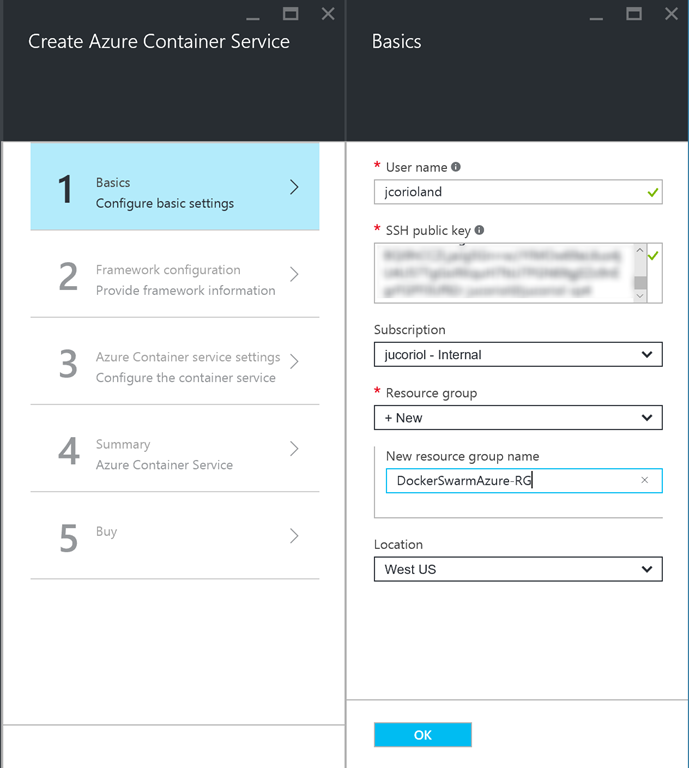
In the first step, you have to enter the name of the user that will be administrator of the cluster and past de SSH public key that has been generated previously. You also have to choose the Azure subscription, a resource group (create a new one is recommanded) and the location where the cluster will be deployed:
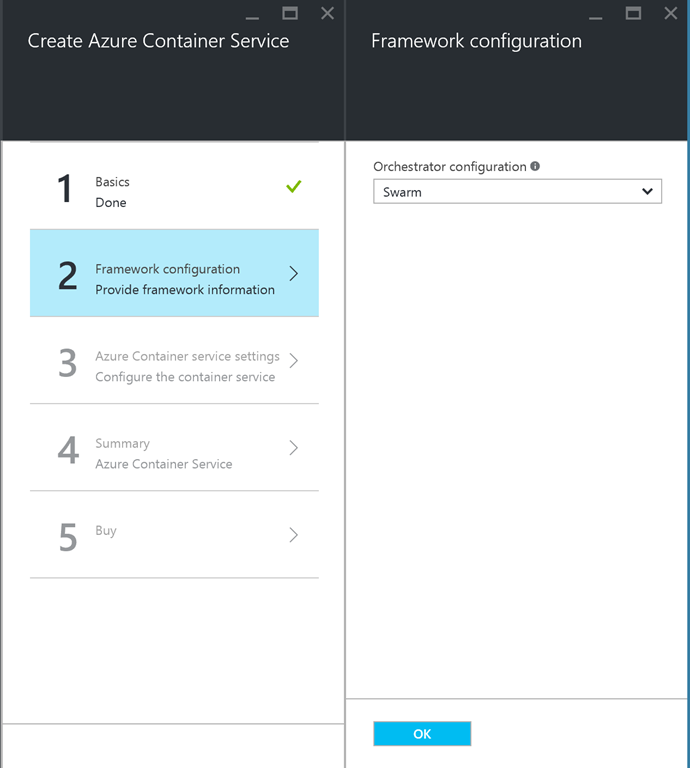
Click OK to go to step 2 where you can choose between the two orchestrators: DC/OS or Swarm (the one I have selected here):
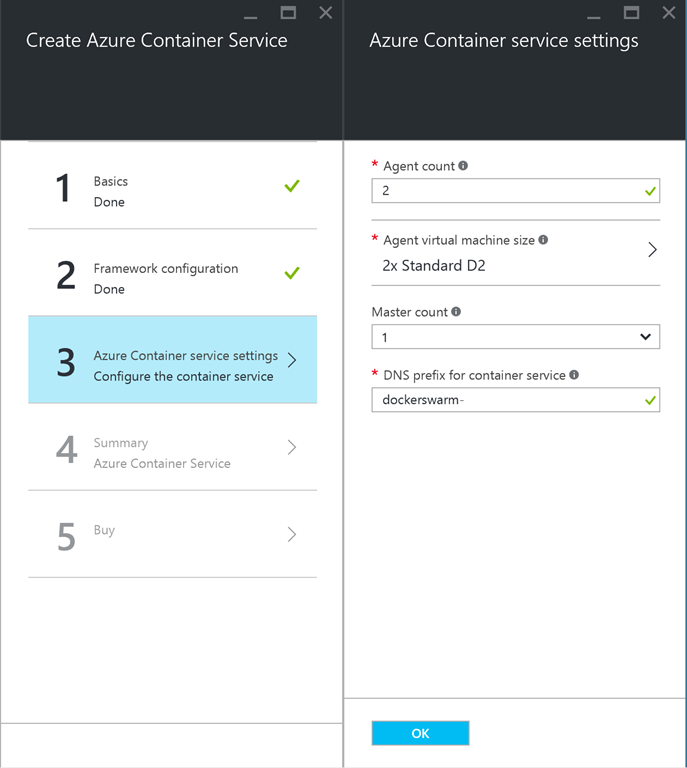
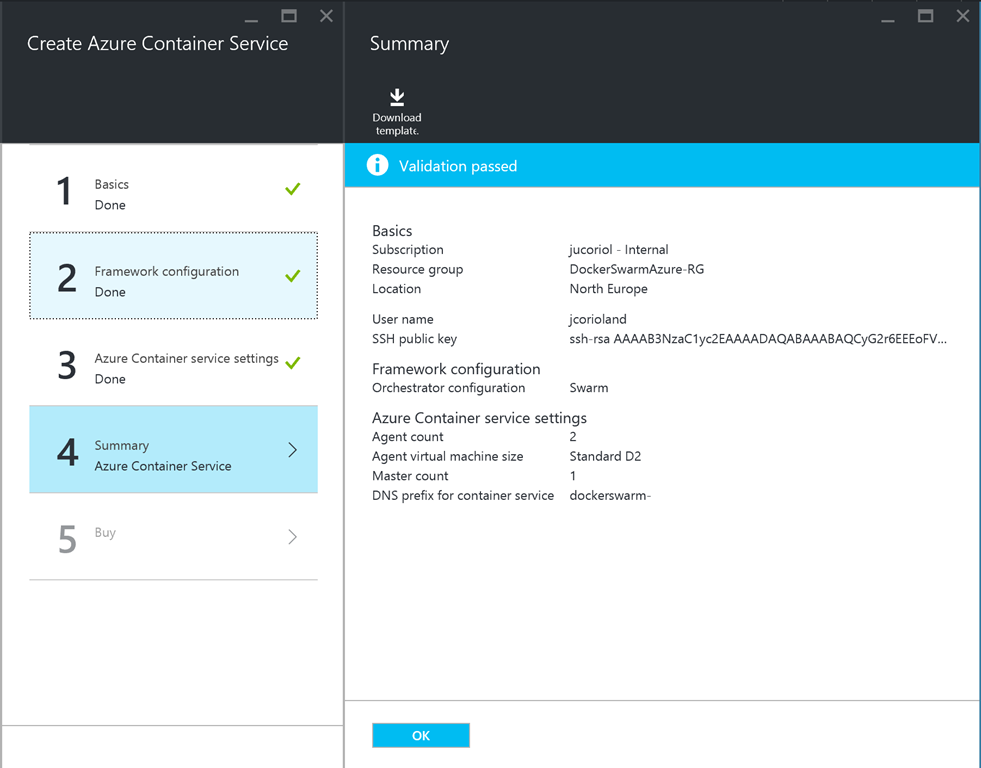
In the next step you have to set some settings for Azure Container Service, like the number of masters, nodes, the virtual machines size to use and a DNX prefix that will be used on each resource that will be created:
Click OK and wait for the final validation. You can also download the Azure Resource Manager template that has been generated by the portal. You will be able to use this template if you want to deploy another cluster using Azure CLI or PowerShell:
In the last section, click the Create button. Depending on the number of masters/agents you have asked for, the cluster creation may take a little while…
Once the deployment is completed, you can access your new Azure Container Service:
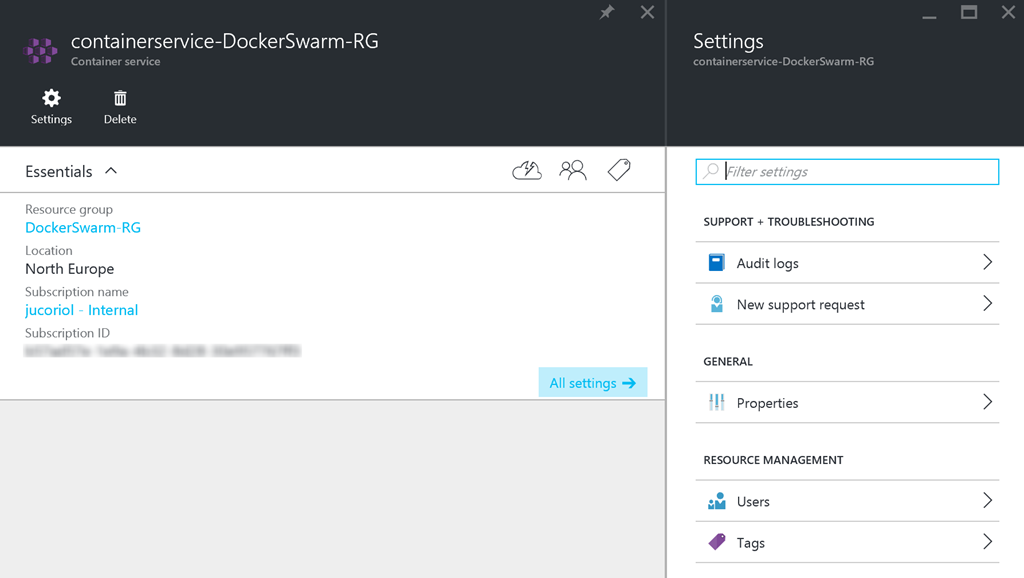
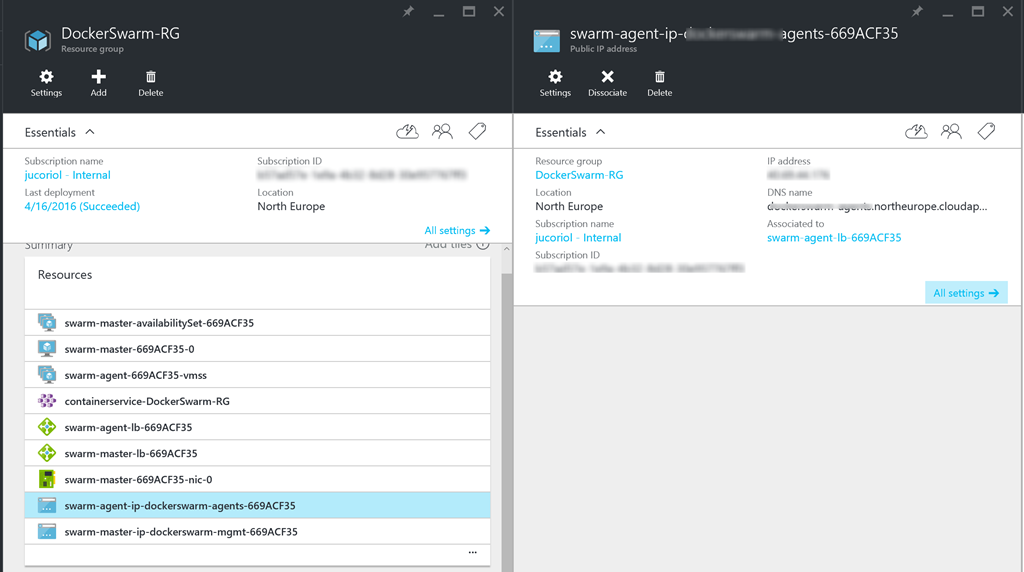
For now, the Container Service view of the portal has no special feature, but you can click on the resource group link to browse all the resources that have been created:
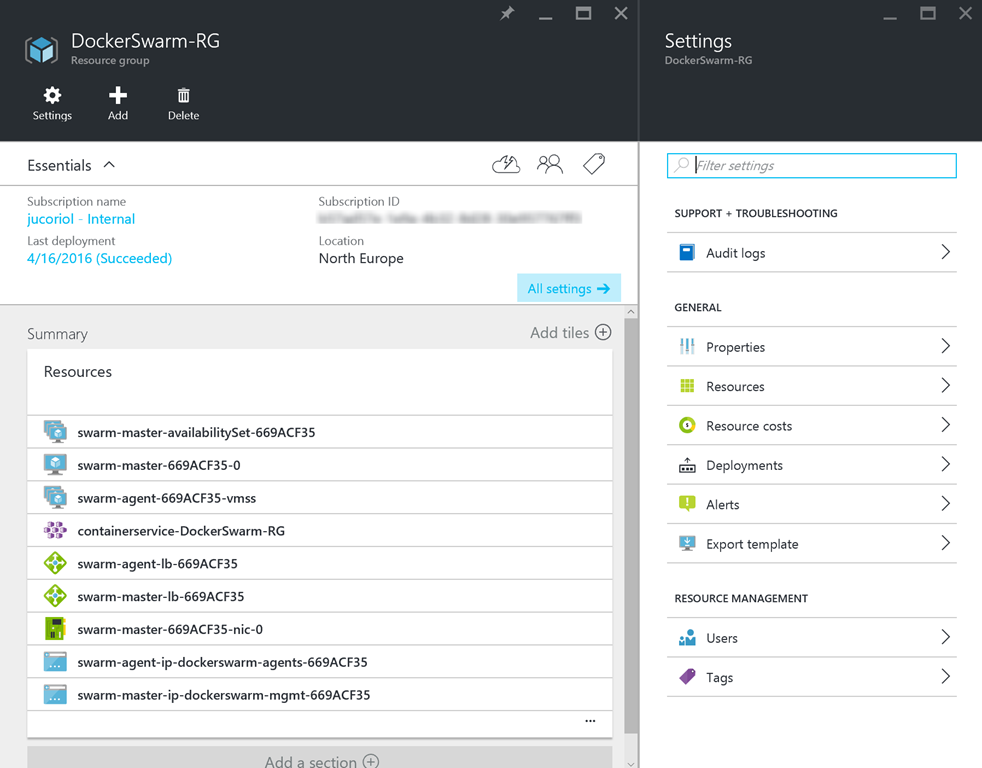
Click on the Resources pane to get a full view of these resources. In the Essentials pane, click on the last deployment to get more information about it. In the Deployment History section click on the last entry to get the deployment’s output information:
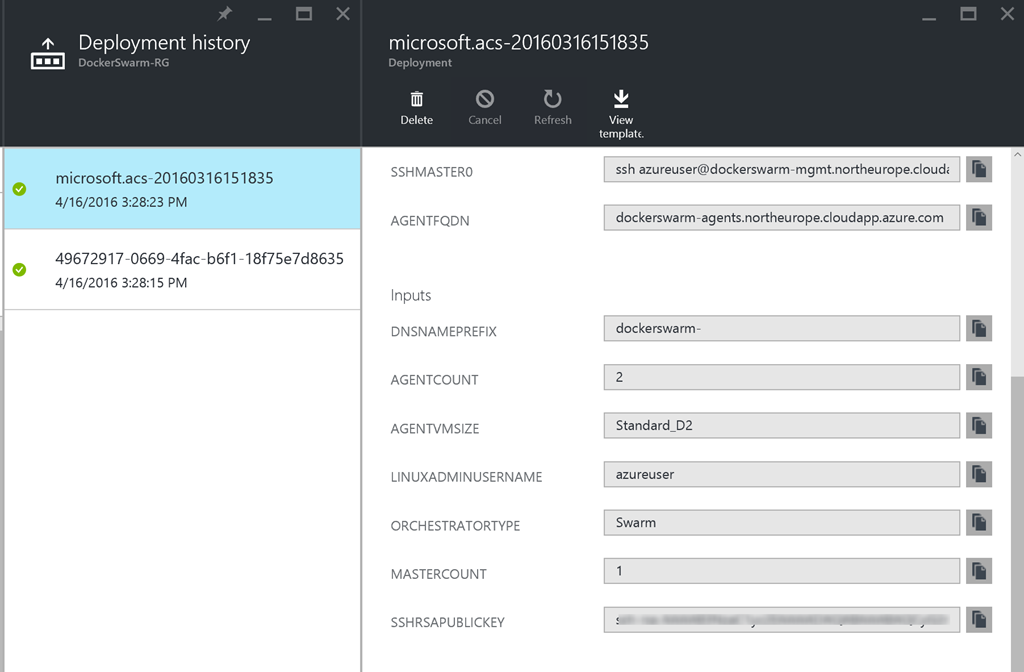
This pane displays a summary of your cluster and you can also get the ssh command that will allow you to connect to the master nodes.
Connect to the Swarm master virtual machine
Connecting to the swarm master is really simple using the SSH command in the output information produced by the deployment, as explained above.
If you are on Linux or Mac, open a terminal. If you are on Windows, you can continue to use Git Bash that provides also an SSH client.
Just paste the command copied from the portal:

Note: if you have not used the default name / directory when generating your SSH key in the first step of this blog post, you should indicate the path to the private key to the ssh command.
You will be asked to enter your passphrase and then, you are connected to the Swarm master:

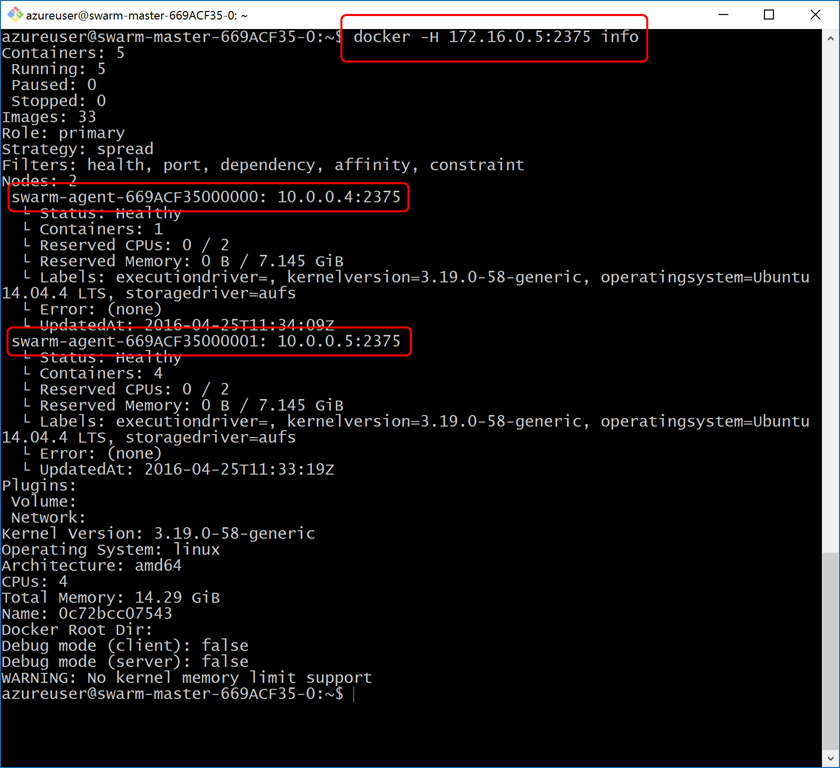
Once connected, you can use the Docker command to work with your Swarm cluster. The Docker Swarm socket is listening to the 172.16.0.5:2375 endpoint. For exemple, you can type the command docker info with the -H option to get information about your Swarm cluster:
Deploying your first Docker container
Now that your cluster in ready, you can deploy your first Docker container! In this sample I have chosen to create a new Docker container based on the official Nginx image available in the Docker Hub Repository.
To start a new container based on this image, you can type the following command:
docker -H 172.16.0.5:2375 run --name hello-nginx -d -p 80:80 nginx
Note: It may take a few minutes the first time, while the image is downloaded.
The command above asks Swarm to run a new container, based on the nginx image and expose the port 80 of the container on the port 80 of the Docker agent.
Then, you can check that the container is running using:
docker -H 172.16.0.5:2375 ps -a

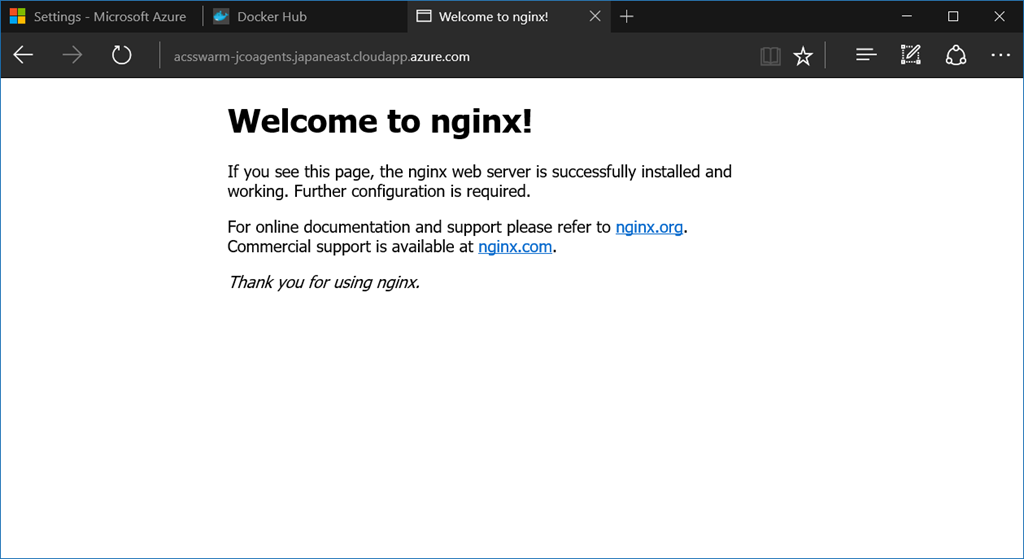
Finally, you can test that your NGINX server is working by browsing the DNS linked to the public IP address of the agents’ load balancer. To get this DNS, just go in the resources that compose your container service in the Azure portal, and click on the public IP address of the agents:
Browse it, and you should see the home page of NGINX:
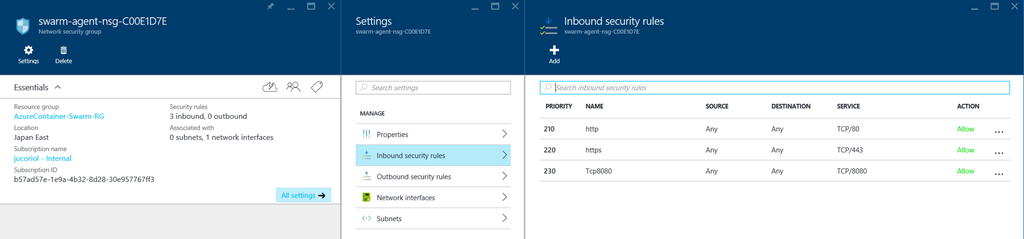
If you want to expose the application on another port, you should configure inbound rules in the network security group that was created for the Docker agent (by default, 80 is authorized):
Conclusion
You have now a fully functional Docker Swarm cluster based on Azure Container Service! As you can see, it is now really simple to create this kind of cluster in Microsoft Azure.
Enjoy!