


Azure Container Service from the Azure CLI
21 Jul 2016 in Azure Container Service | Docker | Microsoft AzureAzure CLI is a node.js cross-platform tool that runs on Linux, Mac OS and Windows and allows to work with Microsoft Azure from the command line. The latest version of Azure CLI includes some commands to create and manage Azure Container Service clusters.
Install Azure CLI
Azure CLI can be installed using the node.js package manager (npm):
npm install –g azure-cli
If you already have installed this tool, you may have to upgrade to the latest version using:
npm update –g azure–cli
The latest published version is 0.10.2. You can check your current version with the command:
azure ––version
You are now ready to work with Azure CLI.
Connect to your Microsoft Azure subscription
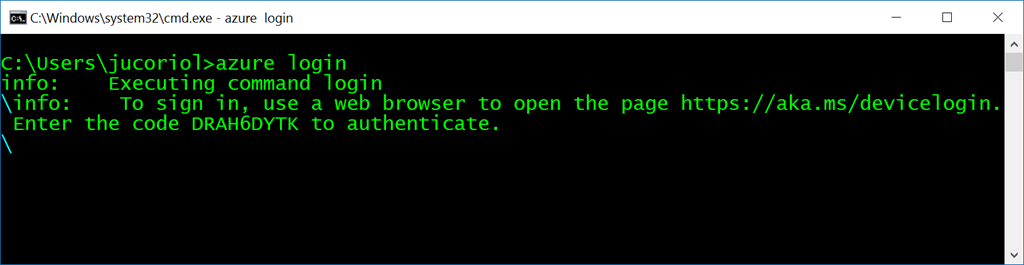
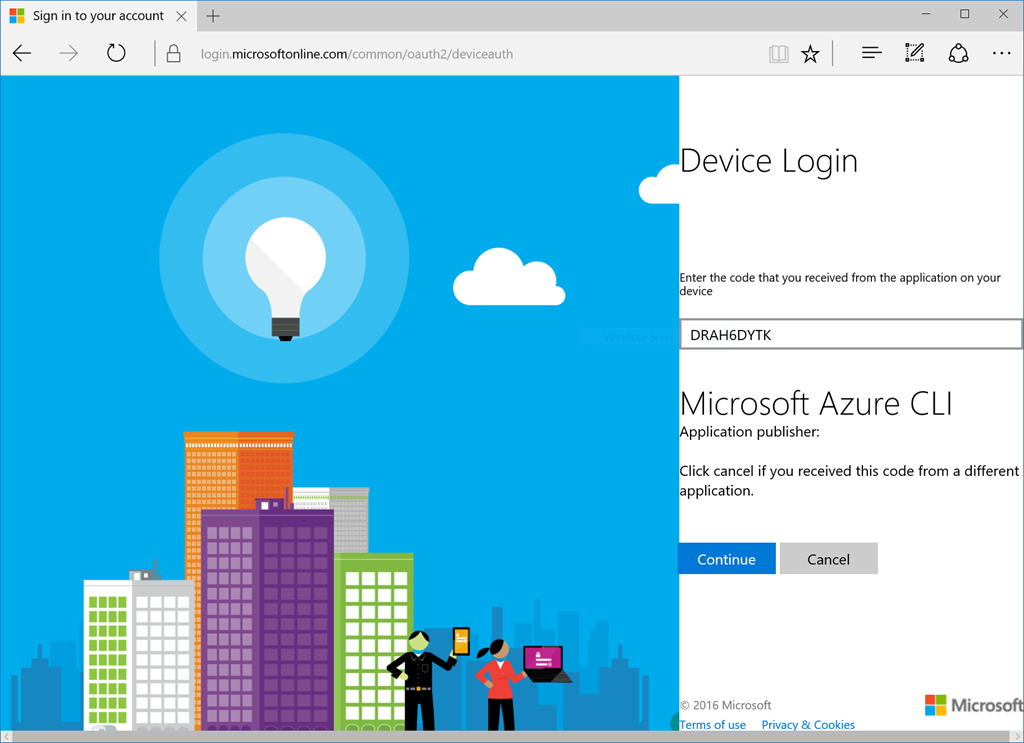
To connect your Microsoft Azure account with Azure CLI, use the azure login command. It will generates a code to use on http://aka.ms/devicelogin. Open this URL in your web browser and enter the code. Then log in to your Microsoft Azure account. Once done, your subscriptions will be imported and usable from the Azure CLI:

Azure CLI supports both ASM (Azure Service Management) and ARM (Azure Resource Management) modes. Azure Container Service requires that you switch to the ARM mode. To do that, use the command:
azure config mode arm
Create an Azure Container Service cluster with Azure CLI
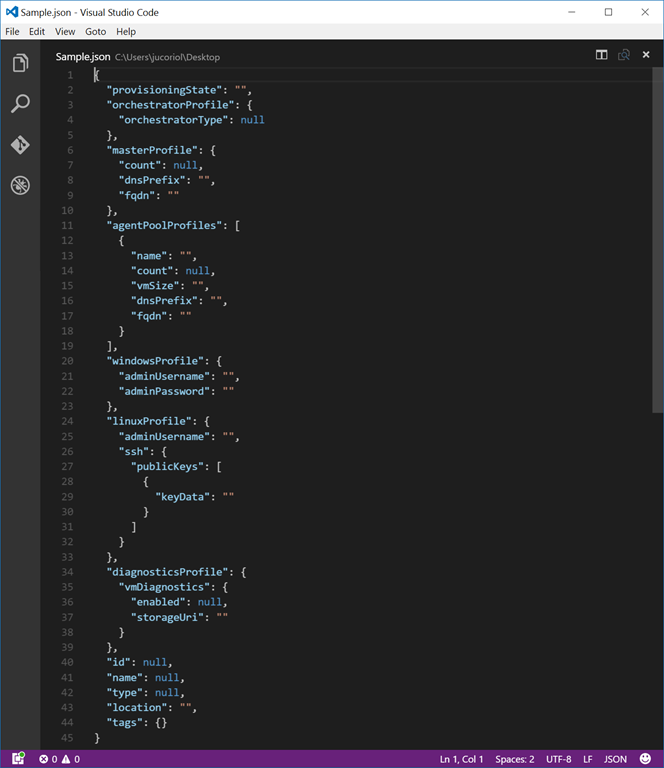
First, you need to generate a JSON parameters file that will be used for the deployment. The generation can be done using the command:
azure acs config create ––json ––parameter-file NameOfYourJSONConfigFile.json
Open your favorite JSON editor (I am personally using Visual Studio Code which is pretty cool). As you can see, all the structure is here, you just have to complete some parameters:
The first JSON object is about the orchestrator you want to use. You need to complete the orchestratorType value with either Swarm or DCOS depending on the orchestrator you want to deploy in your cluster. In this example, I have chosen to use Docker Swarm:
"orchestratorProfile": { "orchestratorType": "Swarm" }
Then you need to complete parameters for the master nodes availability set. You have to specify the number of masters that you want to deploy (1-3-5), the DNS prefix and FQDN where the masters will be accessible. The FQDN is the concatenation of the prefix and your_deployment_region.cloudapp.azure.com. In this case I want 1 master node, deployed on acsazurecli-master.northeurope.cloudapp.azure.com:
"masterProfile": { "count": 1, "dnsPrefix": "acsazurecli-master", "fqdn": "acsazurecli-master.northeurope.cloudapp.azure.com" }
You need also configure the agent pools with the number of machines you want in your cluster, the size of these machines and the DNS/FQDN information:
"agentPoolProfiles": [ { "name": "agentpools", "count": 2, "vmSize": "Standard_A2", "dnsPrefix": "acsazurecli-agents", "fqdn": "acsazurecli-agents.northeurope.cloudapp.azure.com" } ]
For the Docker Swarm deployment, there are no Windows jumpbox so you need to remove the windowsProfile JSON section. You need to provide are the username and the SSH public key that will be used to SSH to the master node. You can read this blog post to learn how to generate an SSH key. Once generated, just past the content of the public key in the keyDate JSON property:
"linuxProfile": { "adminUsername": "jcorioland", "ssh": { "publicKeys": [ { "keyData": "ssh-rsa YOUR PUBLIC SSH PUBLIC KEY" } ] } }
And finally, update the location value at the bottom of the file with the Microsoft Azure location where you want to deploy the cluster:
"location": "northeurope"
Save your file and you’re done for the configuration step!
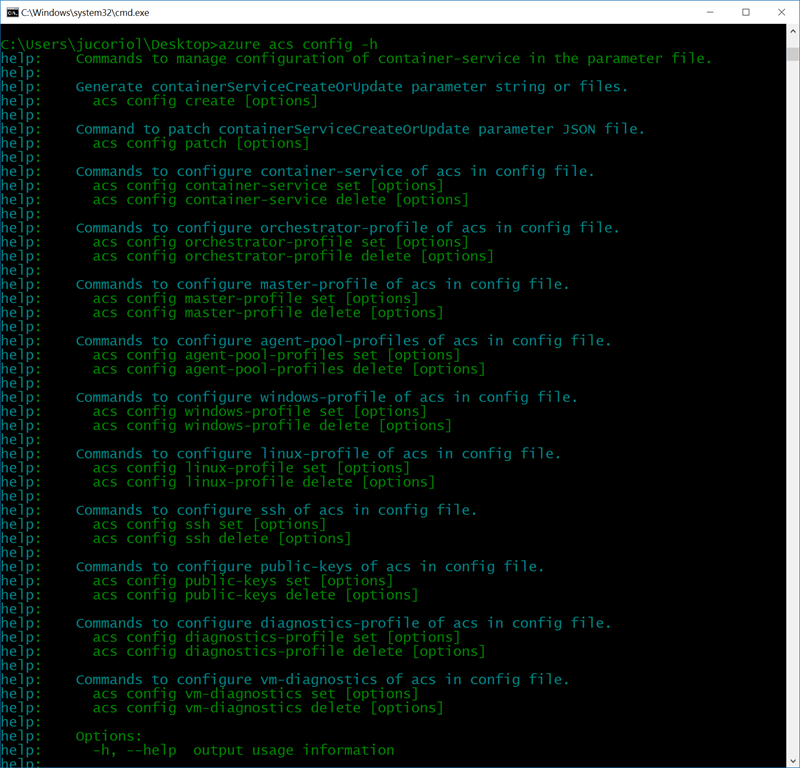
Note: if you do not want to edit the file manually, you can use
acs configcommands from Azure CLI to configure each section:
Now that your parameters file is ready, you can create a new resource group using the following command:
azure group create YourResourceGroupName RegionWhereYouWantToCreateTheGroup
I have chosen to create a resource group named “AzureCliAcs-RG” in the North Europe region:
azure group create AzureCliAcs-RG northeurope
Finally, use the azure acs create command to create a new cluster based on your parameters files:
azure acs create ––json ––parameter-file NameOfYourParameterFile.json --resource-group YourResourceGroupName --name NameOfYourContainerService
Wait for the deployment to be completed (it can take a while depending on the number of agents you asked for). Once the deployment has completed, you can get information about the Azure Container Service cluster using the command:
azure acs show YourResourceGroupName NameOfYourContainerService
Scale the number of agents in your Azure Container Service cluster
Another cool command that has been implemented in the Azure CLI ACS is the scale command. It allows to create more nodes in you cluster if you need to increase its capacity. To do that, you simply need to use the azure acs scale command. For example if you want 4 agents in the cluster type:
azure acs scale YourResourceGroupName NameOfYourContainerService 4
Very cool, isn’t it ? To see all the features implemented for Azure Container Service in the Azure CLI tool, you can use the –h parameter on the azure acs command.