


Full CI/CD pipeline to deploy multi-containers application on Azure Container Service with Docker Swarm using Visual Studio Team Services
29 Nov 2016 in Azure Container Service | DevOps | Microsoft AzureAzure Container Service (ACS) allows to deploy and manage containers using Docker Swarm, Mesosphere DC/OS or Kubernetes orchestrators. Recently, the ACS team open sources ACS-engine. It is now very easy to deploy these three orchestrators on Azure, using the portal, an Azure Resource Manager template or Azure-CLI.
They also have released in preview the Azure Container Registry which is an implementation of the open source Docker Registry and that can run as a service on Azure and is fully compatible with Docker Swarm, Kubernetes and DC/OS. This is a private registry that allows to store Docker images for enterprise applications instead of having to use the public Docker Hub, for example.
In this new blog post I will detail how I have used ACS with Docker Swarm, an Azure Container Registry and Visual Studio Team Services to deliver continuously a multi-containers application wrote in .NET Core. Tooling has also been recently released to create a similar CI/CD pipeline with VSTS when using Mesosphere DC/OS.
The application source code is hosted on GitHub and is pretty simple:
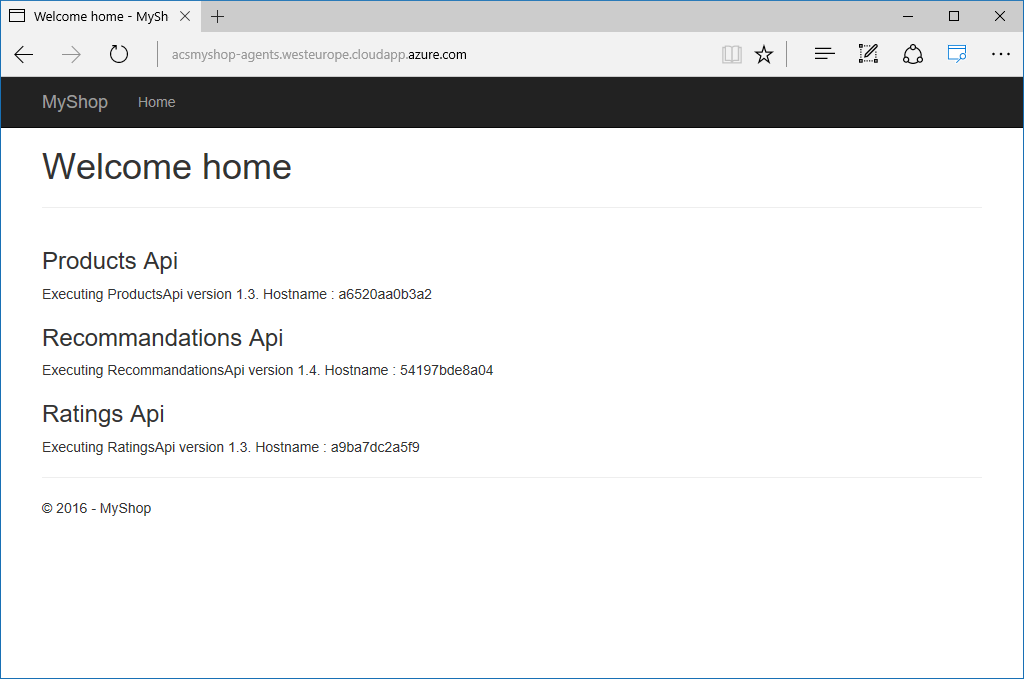
As you can see, it’s a “kind of e-shop” web application that is composed of three APIs (Products, Recommendations and Ratings) and a front that make AJAX calls to these APIs. The APIs do nothing more than returning their versions and the name of the host they are running on. In this case, it’s the id of the container they are running within.
My goal is to ensure that as soon as I commit a change on GitHub, the application is redeployed on Azure Container Service. Here is the workflow that I am going to describe:
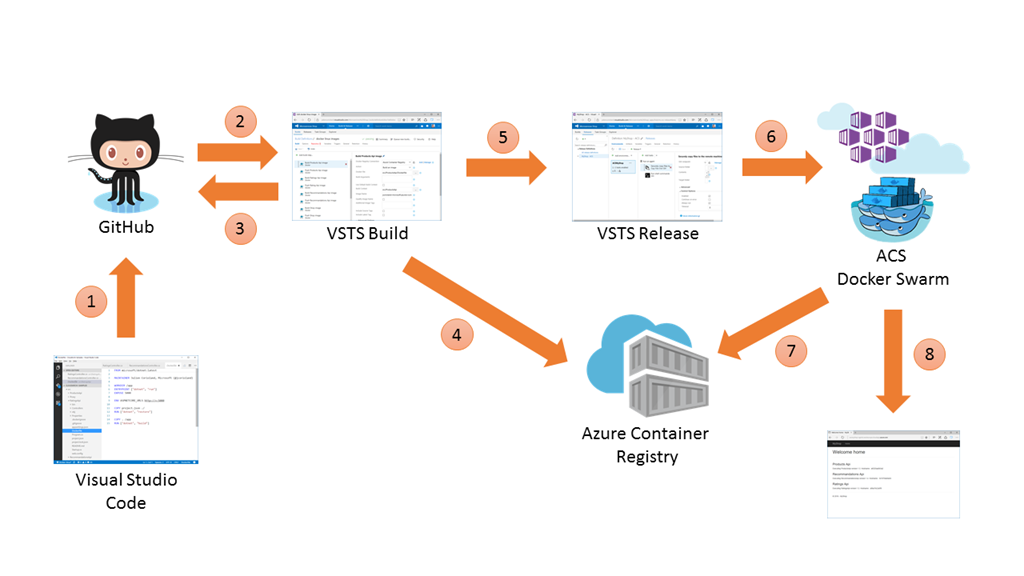
- I develop new feature using Visual Studio Code (or any IDE) and commit changes on GitHub
- GitHub triggers a build in Visual Studio Team Services
- Visual Studio Team Services gets the latest version of the sources and build all the images that compose my application
- Visual Studio Team Services pushes each image in the Azure Container Registry
- Visual Studio Team Services triggers a new release
- The release runs some commands using SSH on the ACS cluster master node
- Docker Swarm on ACS pull the latest version of the image
- The new version of the application is deployed using docker-compose
Now that you have the big picture, let’s go deep dive in this CI/CD pipeline!
Deploy a Docker Swarm cluster with ACS and an Azure Container Registry
I have already blogged several times on how you can use the Azure portal to deploy a Docker Swarm cluster using Azure Container Services or on you can do it using Azure CLI.
While the cluster deployment is pending, you can create a new Azure Container Registry. To do that, go to the Azure Portal and search for Azure Container Registry:
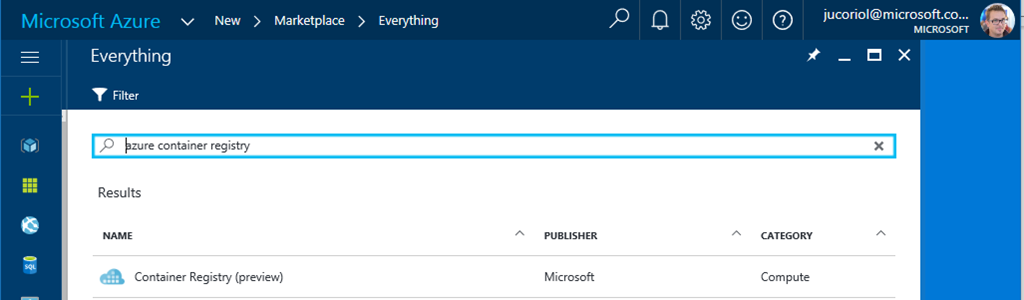
Click on the “Container Registry (preview)” entry and then click on the Create button in the right pane that opens. The only things that you need to configure are:
- The name of your registry to make it available on: yourname.azurecr.io
- The subscription, resources group and location you want to deploy this new registry (you can deploy it in the same resource group than the Azure Container Service cluster, but it is not mandatory)
- If you want to create an admin user with a password that has rights to push/pull image into the registry. Enable this option (you can do it after too). You can also use an Active Directory Service principal to authenticate the registry.
- The storage account where you want to store the Docker images. If you let the default option, it will create a new one in the same resource group
Then, just click the Create button. Once done, you can access your brand new Azure Container Registry and get the URL and Access Key (the admin username and password) that allows to connect to the registry:
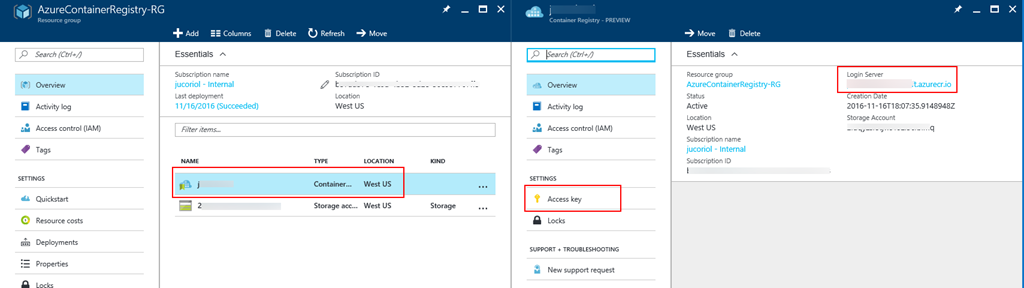
You can test the registry using the docker login command:
You now have an Azure Container Service and an Azure Container Registry. The next step is to define the CI/CD pipeline in Visual Studio Team Services.
Configure Visual Studio Team Services
The first thing you need to do to build and deploy “dockerized” applications on Linux using Visual Studio Team Services is to get the Docker integration task from the Marketplace and configure a Linux build agent. All the steps are detailed on this page.
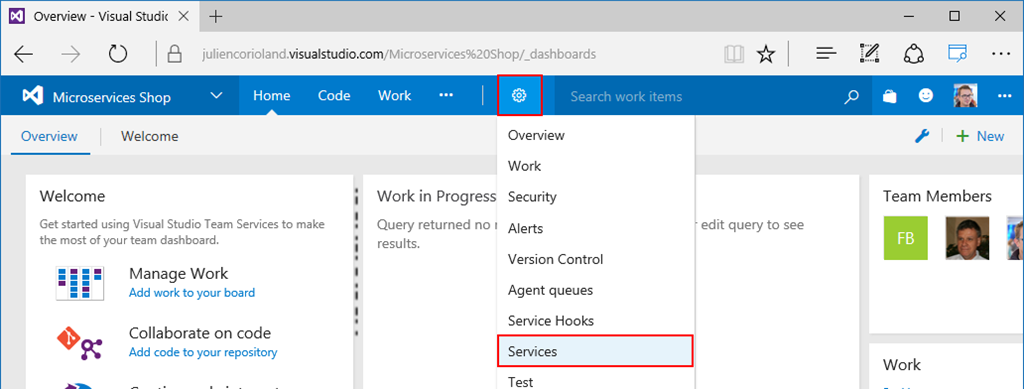
Once done, you can declare the different external services that will be needed during the build and release processes: the Azure Container Registry, the GitHub account and an SSH connection to the Docker Swarm cluster.
This can be done in the Services entry of the settings menu, in your team project:
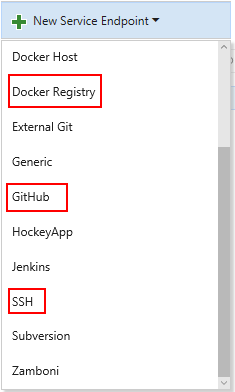
Add three different endpoints, for each type of external services:
Create the build definition
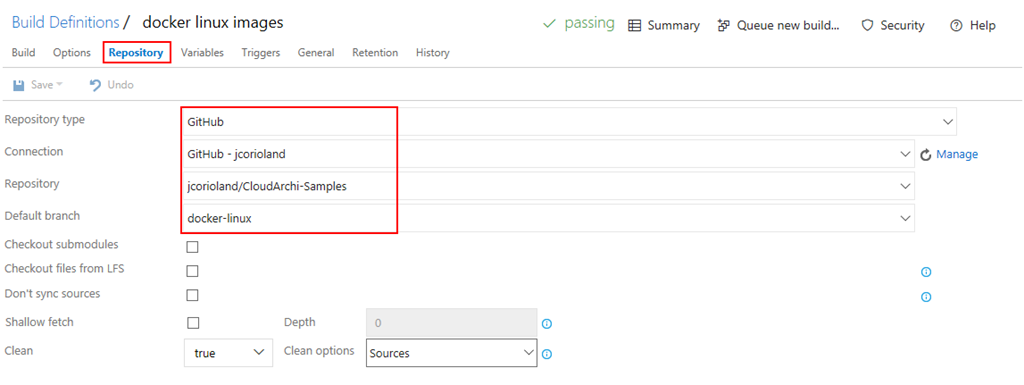
Now, it’s possible to create a new build definition, linked to the GitHub repository and that uses the Docker build task to build and push each image of the application in the Azure Container Registry:
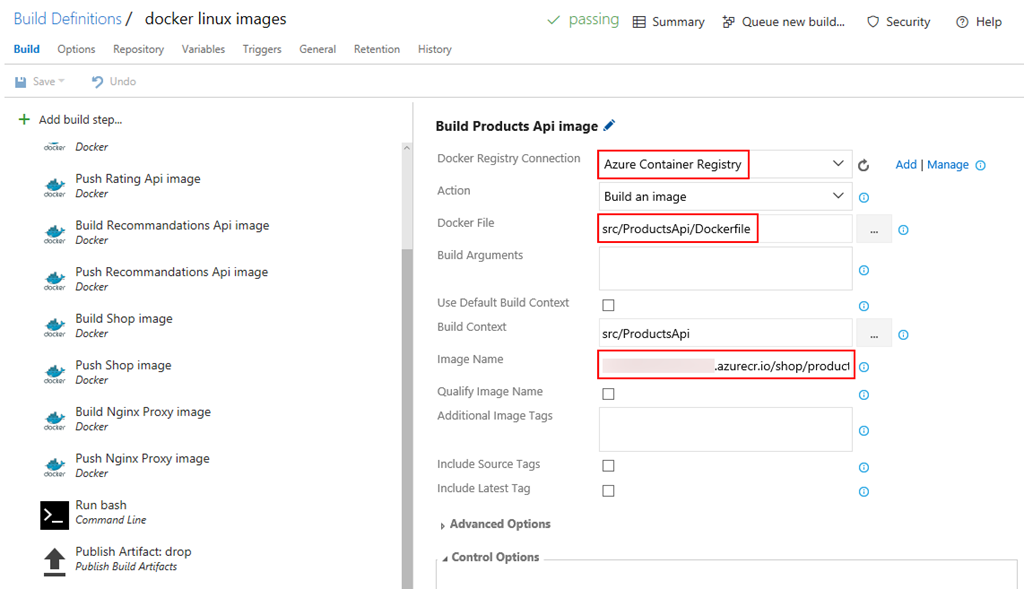
I have already detailed all these steps in a preview article here. But there are some points that need more attention: when you are working with a private registry and not with the Docker hub, you need to prefix the name of your image with the URL of your registry, here yourname.azurecr.io.
On the capture, the Azure Container Registry is the external service that I have configured to point to the Azure Container Registry created above.
Last, but not least, I have added two more task in the build workflow that were not in my preview post.
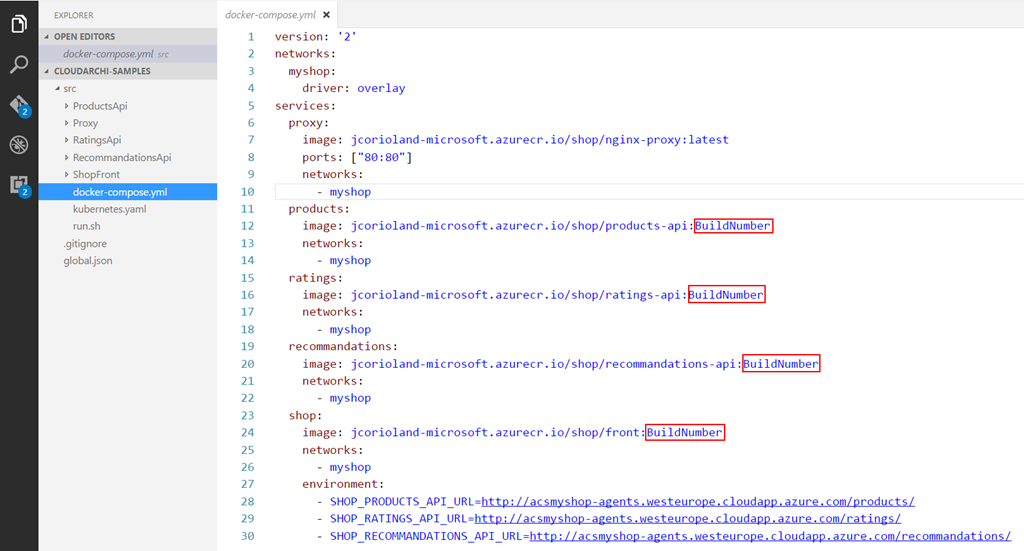
A command line task that executes a simple bash command to replace a token in the docker-compose.yml file to update it with the latest version of the images that have been built and pushed to the registry (actually, the number of the running VSTS build received from the $(Build.BuildNumber) variable):

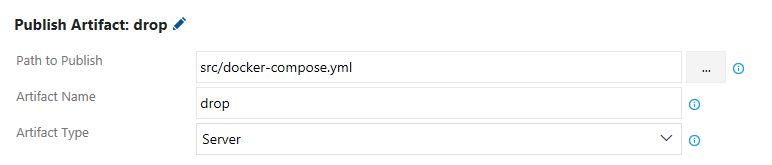
And a task that copies the updated compose file as an output artefact of the build to make it available later in the release process:
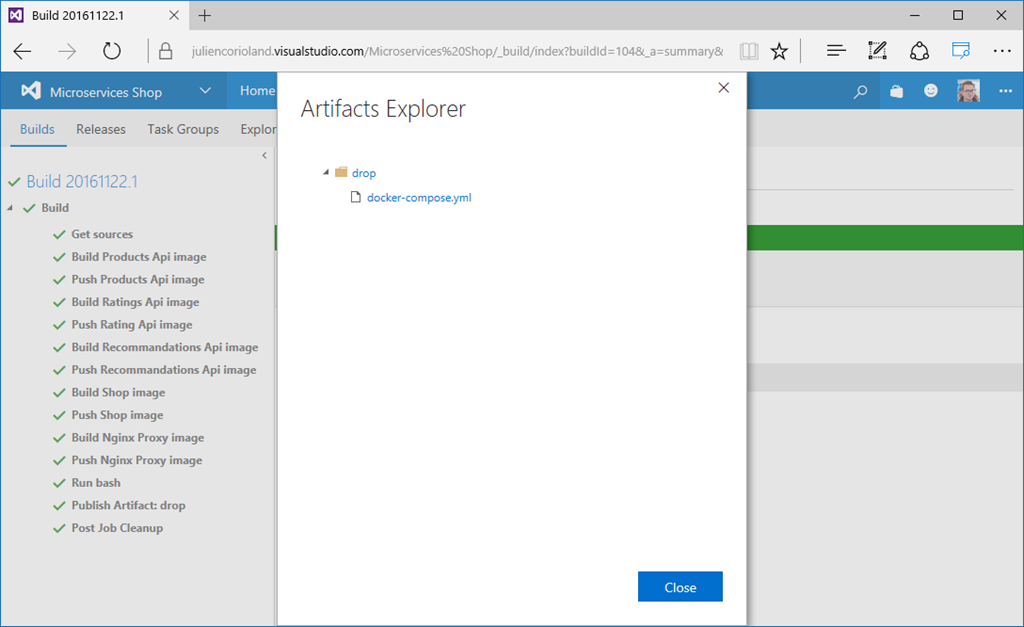
Now, when a build is completed, all the images are pushed in the Azure Container Registry and an updated version of the docker-compose.yml file is available as an output:
That’s being done, it’s time to define a new release to deploy the application on the Docker Swarm cluster!
Create the release definition
Visual Studio Team Services allows to manage releases across environments. It is possible to enable continuous deployment to make sure that your application is deployed on your different environments (dev, qa, pre-production, production…) in a smooth way. In this case, I have a single environment : the Docker Swarm cluster deployed with Azure Container Service:
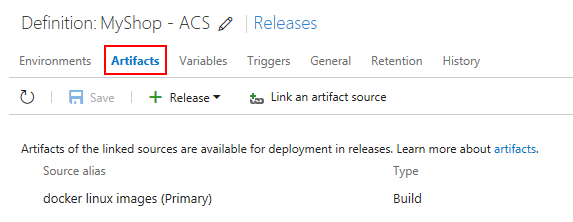
Before detailing the tasks that are done within the release, there are two important things to explain. I have linked the release to the build detailed above to make the artefact (the docker-compose.yml file) available in the release steps:
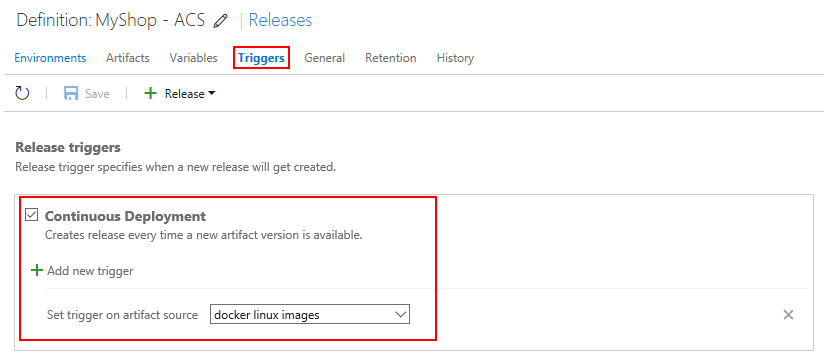
Then, I have configured Continuous Deployment in the Triggers tab to make sure a new release is launched as soon as the build is successfully completed:
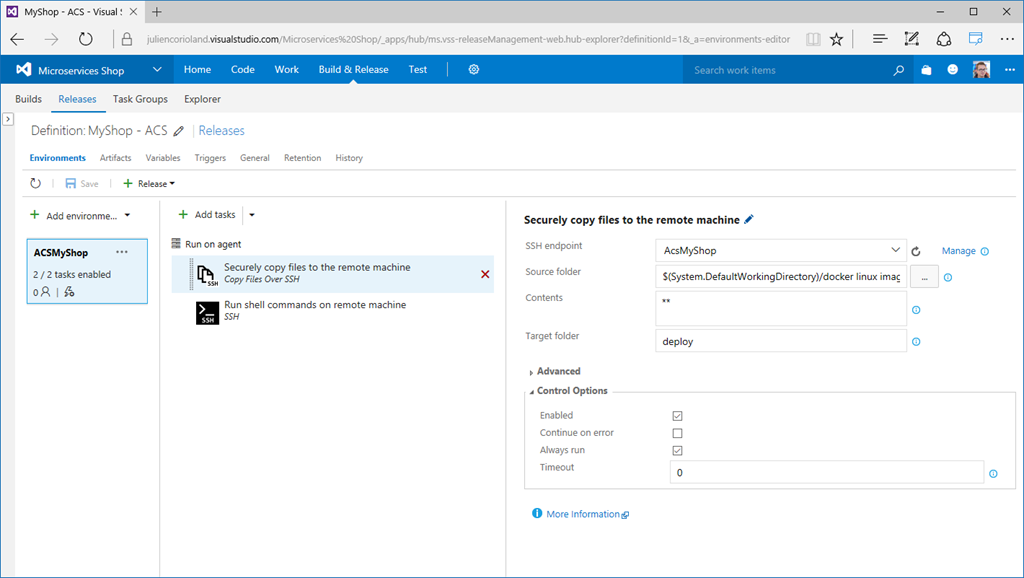
The release itself is really simple in this case. It is composed of two steps: using SCP to copy the docker-compose.yml file using SSH on a master node of the Docker Swarm cluster:

A second task that executes a bash command on the master node, using SSH:

The command that is executed is actually quite simple:
docker login -u $(docker.username) -p $(docker.password) $(docker.registry) && export DOCKER_HOST=:2375 && cd deploy && docker-compose pull && docker-compose stop & docker-compose rm -f && docker-compose up -d
It uses the Docker CLI on the VSTS Linux agent to
- Login to the Azure Container Registry
- Set the DOCKER_HOST variable to connect to the port that Docker Swarm is listening on
- Go into the deploy directory that contains the compose file that has been copied using the SCP task before
- Use the docker-compose pull command that will pull the new Docker images from the Azure Container Registry to the Swarm nodes
- Use the docker-compose stop and docker-compose rm command to stop and remove the previous running containers
- Use the docker-compose up –d to start the application with the new images that have been pulled
As you can see on the capture above, the Fail on STDERR checkbox is unchecked. This is an important part that you do not want to miss! Actually, docker-compose print several diagnostic information like that containers are stopping or being deleted on the standard error output. If you let the checkbox checked, Visual Studio Team Services will consider that some errors have occurred during the release, even if all goes well.
Wrapping up
In this article I explained how you can deliver a multi-containers application continuously using Azure Container Service, Azure Container Registry with Visual Studio Team Services. Now, as soon as a change is committed to GitHub, a build is triggered in Visual Studio Team Services, runs on a Linux agent that build and pushes the new images in the Azure Container Registry, update the compose file with the latest version of the images and copy this file as an output artefact. Then, Visual Studio Team Services triggers a new release that use SCP to copy the new compose file on the Docker Swarm master node and then use a bash script to deploy the new application using the docker-compose CLI.
One improvement I am thinking to do is to separate each service that compose the application in different GitHub repositories so I can have one build per project (and per Docker image) and one release per image. In this way, I will be able to update only one service in the application and not the whole application.
Hope this helps