


Use Azure managed identities with Azure Kubernetes Services (AKS)
05 Sep 2018 in Kubernetes | Microsoft AzureIn this blog post, I will explain how you can use the aad-pod-identity project (currently in Beta) to get an Azure managed identity bound to a pod running in your Kubernetes cluster. I will illustrate this with a basic sample that consists in retrieving secrets from an Azure Keyvault in a Go application running in a Kubernetes pod.
Azure Keyvault is a great option to externalize the way you are storing secrets and credentials required by your application outside of the application. But you still need to have a credentials to access Azure Keyvault. This issue can now be solved by using Azure Active Directory Managed Identities.
Disclamer: I’ve chosen to illustrate with Azure Keyvault because this sample is really simple and help to understand how managed identites can help in similar scenarios. If you are looking specifically for a solution to get your Azure Keyvault secrets inside Kubernetes automatically, you may want to have a look to the Kubernetes-Keyvault-FlexVolume project instead (btw, this project uses itself aad-pod-identity, for the record).
Azure managed identities allow your application or service to automatically obtain an OAuth 2.0 token to authenticate to Azure resources, from an endpoint running locally on the virtual machine or service (if it supports Managed Service Identities) where your application is executed. Their are two different types of managed identities in Azure: system-assigned identities, that you can enable directly on the Azure services that support it (a virtual machine or Azure App Service, for example) and user-assigned managed identities that are Azure resources created separately.
When using Azure Kubernetes Service you can enable Managed Service Identity on all the nodes that are running in the cluster and then retrieve OAuth 2.0 tokens, like with any workloads running on a virtual machine in Azure. But by doing that you should know that it means that ALL the pods running on the same node will use the same managed identity, even if they are running in different namespaces, for different teams or different customers (if you are running a multi-tenants application). That makes really difficult to assign roles with fine-grade control in Azure RBAC.
This is where the aad-pod-identity project comes up as it provides:
- CRDs for AzureIdentity and AzureIdentityBinding which are resources definitions for Azure managed identity and the binding to this identity within the Kubernetes cluster
- Two infrastructure components, Managed Identity Controller (MIC) and Node Managed Identity (NMI) that will handle the managed identities flow for your applications
Note: read the full design docs and the flow diagram for more details.
In the following, I will assume that you already have an Azure Kubernetes Service cluster running. If not, you can deploy one following this documentation. Please pay attention to the service principal you are using to create the cluster, as you will need its identifier to configure Azure AD Pod Identity. If you are not familiar with AKS and Service principals, read this page first.
Create an Azure Keyvault instance
You can create an Azure Keyvault instance using the following command:
az group create -n keyvault-aad-pod-identity-rg -l westeurope
az keyvault create -n keyvaultk8s -g keyvault-aad-pod-identity-rg -l westeurope
Once the Azure Keyvault instance is ready, you can create a secret:
az keyvault secret set -n mySecret --vault-name keyvaultk8s --value MySuperSecretThatIDontWantToShareWithYou!
Now, the goal is to retrieve the value of the secret mySecret from inside a pod running in the Kubernetes cluster, without passing any credentials to the application! But first thing first, let’s setup your AKS cluster!
Configure your Kubernetes cluster to run Azure AD Pod Identity infrastructure
If you want the full details, everything to know is well documented on the project page.
In short, if you are not using RBAC you just have to execute this command to install all you need on your Kubernetes cluster:
kubectl create -f https://raw.githubusercontent.com/Azure/aad-pod-identity/master/deploy/infra/deployment.yaml
If you have RBAC on your cluster, use this:
kubectl create -f https://raw.githubusercontent.com/Azure/aad-pod-identity/master/deploy/infra/deployment-rbac.yaml
Create an Azure managed identity
Now that your Kubernetes cluster is ready to provide Azure Active Directory tokens to your applications, you need to create an Azure Managed Identity and assign role to it. This is the identity that you will later bind on your pod running the sample application.
To create a managed identity, you can use this command:
az identity create -n keyvaultsampleidentity -g keyvault-aad-pod-identity-rg
Note: keep the
principalIdandclientIdfrom the output of this command, you will need it later.
Then you need to make sure the managed identity has Reader role on the Azure KeyVault resource:
az role assignment create --role "Reader" --assignee <principalId> --scope /subscriptions/{YourSubscriptionID}/resourceGroups/keyvault-aad-pod-identity-rg/providers/Microsoft.KeyVault/vaults/keyvaultk8s
And that it can access the secrets:
az keyvault set-policy -n keyvaultk8s --secret-permissions get list --spn <clientid>
aad-pod-identity uses the service principal of your Kubernetes cluster to access the Azure managed identity resource and work with it.
This is why you need to give this service principal the rights to use the managed identity created before:
az role assignment create --role "Managed Identity Operator" --assignee <servicePrincipalId> --scope /subscriptions/{YourSubscriptionID}/resourceGroups/keyvault-aad-pod-identity-rg/providers/Microsoft.ManagedIdentity/userAssignedIdentities/keyvaultsampleidentity
Note: if you did not define a specific service principal when you’ve deployed your AKS cluster, you will find the identifier of the service principal that has been used in
~/.azure/aksServicePrincipal.json
Create Kubernetes AzureIdentity and AzureIdentityBinding
To be able to bind the managed identity you’ve created to the pod that will run the sample application, you need to define two new Kubernetes resources: an AzureIdentity and an AzureIdentityBinding.
azureidentity.yaml:
apiVersion: "aadpodidentity.k8s.io/v1"
kind: AzureIdentity
metadata:
  name: keyvaultsampleidentity
spec:
  type: 0
  ResourceID: /subscriptions/{YourSubscriptionID}/resourceGroups/keyvault-aad-pod-identity-rg/providers/Microsoft.ManagedIdentity/userAssignedIdentities/keyvaultsampleidentity
  ClientID: <clientid>
Note: you will find the
clientidfield the output of the identity creation command.
kubectl apply -f azureidentity.yaml
azureidentitybinding.yaml:
apiVersion: "aadpodidentity.k8s.io/v1"
kind: AzureIdentityBinding
metadata:
  name: keyvaultsampleidentity-binding
spec:
  AzureIdentity: keyvaultsampleidentity
  Selector: keyvaultsampleidentity
Note: the value of the
Selectorproperty in the YAML definition above will be used to bind the Azure identity to your pod, using labels in its specifications.
kubectl apply -f azureidentitybinding.yaml
Deploy the sample application
To demonstrate this blog post, I’ve written a basic web server in Go that uses the Azure SDK for Go to interact with Azure Keyvault. You can check the code here.
The important part is:
keyClient := keyvault.New()
authorizer, err := auth.NewAuthorizerFromEnvironment()

if err == nil {
    keyClient.Authorizer = authorizer
}
Note: By default, the
NewAuthorizerFromEnvironmentretrieve the authorization token automatically from the local managed identity endpoint (the aad-pod-identity server). You can read more details about how the Azure Authorization Go SDK works here.
The YAML definition below defines a deployment to run the sample application using a pre-built Docker image. You can build your own from the sample GitHub repository if you prefer.
keyvaultsample.yaml:
apiVersion: apps/v1
kind: Deployment
metadata:
  labels:
    app: keyvaultsample
    aadpodidbinding: keyvaultsampleidentity
  name: keyvaultsample
  namespace: default
spec:
  replicas: 1
  selector:
    matchLabels:
      app: keyvaultsample
  template:
    metadata:
      labels:
        app: keyvaultsample
        aadpodidbinding: keyvaultsampleidentity
      name: keyvaultsample
    spec:
      containers:
      - name: keyvaultsample
        image: jcorioland/keyvault-aad-pod-identity:1.1
        env:
        - name: AZURE_KEYVAULT_NAME
          value: keyvaultk8s
        - name: AZURE_KEYVAULT_SECRET_NAME
          value: mySecret
        - name: AZURE_KEYVAULT_SECRET_VERSION
          value: a1b2456e4ffc45be9239611f357a4321
---
apiVersion: v1
kind: Service
metadata:
  name: keyvaultsample
  namespace: default
spec:
  ports:
  - port: 80
    targetPort: 8080
  selector:
    app: keyvaultsample
  type: LoadBalancer
As you can see in the YAML file above, the Selector that has been defined earlier in the AzureIdentityBinding is used with the aadpodidbinding label. This is where the binding between the Azure identity and the pod is done.
Note: pay attention to replace the environment variable for the containers with the appropriate values. You can find the secret version using
az keyvault secret show(last part of its id).
Deploy the sample application:
kubectl create -f keyvaultsample.yaml
Once the pod has started and a public IP address has been assigned to your service, you can just browse http://{PUBLIC_IP}/keyvault and you should see the value of the secret stored in your Azure Keyvault:
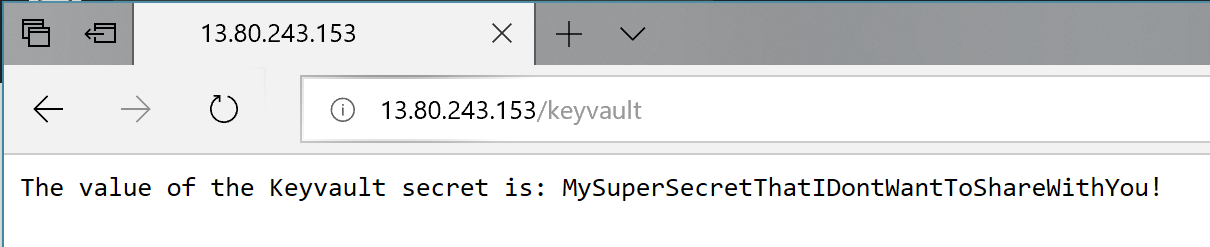
Using Azure Managed identities and aad-pod-identity you’ve been able to give access rights to a given pod to Azure Keyvault resource, without having to pass credentials in a config file or any environment variable, and this is really awesome!
Hope this helps!