20 Jun 2013 in
Microsoft Azure
Few days ago was released a new version of the Windows Azure Media Services .NET SDK, the version 2.2.0.1 that can be downloaded via the NuGet Packages Manager Console (see http://nuget.org/packages/windowsazure.mediaservices). One of the top feature in this release is the ability to create notification endpoints to be notified when a job state change occurs !
In the previous versions of the SDK, the only way to track job state changes was to keep a list of all job’ ids (in a sql server table, for example) and pull each job through the CloudMediaContext to get its state. This solution works fine but is not really elegant or scalable when dealing with multiple azure worker, for example. Now, it’s possible to create a notification endpoint linked to a Windows Azure Storage Queue and pull this queue instead of the media context. It’s the Windows Azure Media Service backend that manage the messages that are pushed in this queue.
To use the notification endpoints, you need to create a CloudQueue that will be used for notification endpoint(s) :
//create the cloud storage account from name and private key
CloudStorageAccount cloudStorageAccount = CloudStorageAccount.Parse(StorageConnectionString);

//create the cloud queue client from the storage connection string
CloudQueueClient cloudQueueClient = cloudStorageAccount.CreateCloudQueueClient();

//get a cloud queue reference
CloudQueue notificationsQueue = cloudQueueClient.GetQueueReference(NotificationQueuePath);

//create the queue if it does not exist
if (!notificationsQueue.Exists())
{
notificationsQueue.Create();
}
Now, you can use the CloudMediaContext to create an instance of INotificationEndpoint, the new interface that enables notifications management :
//create the Cloud Media Context
CloudMediaContext mediaContext = new CloudMediaContext("<mediaservicename>", "<mediaservicekey>");

//create a notification endpoint
INotificationEndPoint notificationEndpoint =
mediaContext.NotificationEndPoints
.Create("notificationendpoint", NotificationEndPointType.AzureQueue, NotificationQueuePath);
As you can see, the Create method take a NotificationEndPointType as second parameter. For now, the only possible value (instead of None) is AzureQueue. It may seems that future releases of the SDK will support Azure Service Bus queue or topics ? (I really don’t know, but it will be very cool !  )
)
Once the notification endpoint has been created, you can create the job and all the tasks it should execute as usual :
//create an asset
IAsset asset = mediaContext.Assets.Create("Wildlife HD", AssetCreationOptions.None);

//create an asset file from the sample video file
string fileName = System.IO.Path.GetFileName(VideoTestPath);
IAssetFile assetFile = asset.AssetFiles.Create(fileName);

//upload the asset
assetFile.Upload(VideoTestPath);

//create a media service job
IJob mediaServiceJob = mediaContext.Jobs.Create("Wildlife in HD Adaptive Streaming");

//get the latest Windows Azure Media Encoder
IMediaProcessor mediaProcessor = GetLatestsAzureMediaEncoder(mediaContext);

//create a multi bitrate encoding task
ITask multibitrateTask = mediaServiceJob.Tasks.AddNew("Multibitrate MP4 encoding", mediaProcessor, "H264 Adaptive Bitrate MP4 Set 720p", TaskOptions.None);

//add the asset as input of the task
multibitrateTask.InputAssets.Add(asset);

//create the output asset
multibitrateTask.OutputAssets.AddNew("Wildlife HD Output", AssetCreationOptions.None);
Before submitting the job, you have to declare the association with the notification endpoint. To do that, a new property has been added on the IJob interface : JobNotificationsSubscriptions. Call AddNew on this property to link the notification endpoint to the job :
mediaServiceJob.JobNotificationSubscriptions.AddNew(NotificationJobState.FinalStatesOnly, notificationEndpoint);
Now, you can submit the job :
mediaServiceJob.Submit();
Et voilà ! To be notified of each job state change you just need to pull the CloudQueue :
while (continuePull)
{
Thread.Sleep(5000);//sleep for 5 sec

//get a cloud queue message
CloudQueueMessage message = notificationsQueue.GetMessage();
if (message == null)//if null, continue
continue;
}
The message content is serialized as json so you can use the DataContractJsonSerializer to get an object that as this prototype :
public class EncodingJobMessage
{
public String MessageVersion { get; set; }

public String EventType { get; set; }

public String ETag { get; set; }

public String TimeStamp { get; set; }

public IDictionary<string, object> Properties { get; set; }
}
The EventType property can take two values :
The Properties property is a dictionary that contains different information about the notification event :
-
JobId : the id of the job
-
NewState : the new state
-
OldState : the old state
-
NotificationEndpointId : the id of the notification endpoint
-
State : the state of the notification endpoint (Registered or Unregistered)
Here is a sample of message deserialization using the DataContractJsonSerializer :
//get the bytes
using (MemoryStream ms = new MemoryStream(message.AsBytes))
{
//deserialize the message
DataContractJsonSerializerSettings jsonSerializerSettings = new DataContractJsonSerializerSettings();
jsonSerializerSettings.UseSimpleDictionaryFormat = true;

DataContractJsonSerializer serializer = new DataContractJsonSerializer(typeof(EncodingJobMessage), jsonSerializerSettings);
EncodingJobMessage jobMessage = (EncodingJobMessage)serializer.ReadObject(ms);

//if the event type is a state change
if (jobMessage.EventType == "JobStateChange")
{
//try get old and new state
if (jobMessage.Properties.Any(p => p.Key == "OldState") && jobMessage.Properties.Any(p => p.Key == "NewState"))
{
string oldJobState = jobMessage.Properties.First(p => p.Key == "OldState").Value.ToString();
string newJobState = jobMessage.Properties.First(p => p.Key == "NewState").Value.ToString();

Console.WriteLine("job state has changed from {0} to {1}", oldJobState, newJobState);
}
}
}
This new feature is really cool and allows more flexible and scalable architecture when dealing with Windows Azure Media Services jobs !
Hope this helps
Julien
read more
06 Jun 2013 in
Microsoft Azure
Maybe you are familiar with the Windows Azure portal that allows you to manage your hosted services, deployments, storage accounts, service bus namespaces or anything you want to do on your Azure subscription. Actually, all the operations you can perform on this portal are also available in sets of http management REST APIs. All you need to access these operations is a development platform that is able to create and send an http request with a client certificate !
In this post, I will use C# and .NET to manipulate the Windows Azure REST APIs but you really can use any other platforms, that is the power of Azure 
First step : create and upload the client certificate
In a running in Administrator Visual Studio Command Prompt, type the following command :
makecert -sky exchange -r -n "CN=<CertificateName>" -pe -a sha1 -len 2048 -ss My "<CertificateName>.cer"
This command makes two things :
Now, you have to upload the management certificate to the Windows Azure subscription you want manage through REST APIs. To do that, log in to the management portal at http://manage.windowsazure.com.
Click on the Settings section at the bottom of the left menu to access the management certificates. Now you can download your certificate from your computer. Choose the generated certificate and upload it to your subscription. Once the certificate is uploaded the list is refreshed and you can copy the thumbprint of the certificate. You will use this thumbprint to access the management REST API. You can also copy the id of the subscription that is needed to manage the subscription.
Second step : write the code to retrieve the management certificate from store
Because you have to add the management certificate in the client certificates of the http web request, you have to retrieve it from you local store. The thumbprint is used to get the certificate :
private X509Certificate2 GetManagementCertificateFromStore(string certThumbprint)
{
X509Store certStore = new X509Store(StoreName.My, StoreLocation.CurrentUser);
certStore.Open(OpenFlags.ReadOnly);
certStore.Open(OpenFlags.ReadOnly);

X509Certificate2Collection certCollection =
certStore.Certificates.Find(X509FindType.FindByThumbprint, certThumbprint, false);

certStore.Close();

if (certCollection.Count == 0)
{
throw new InvalidOperationException("The certificate with thumbprint {0} was not found in the My store of the current user");
}

return certCollection[0];
}
It’s also possible to load the client certificate from any other place as soon as you get it as a X509Certificate2 reference !
Third step : access the management API with an HttpWebRequest
To begin, you have to choose which operation you want execute. A complete list of all operations that are available in the management REST APIs and the description of each operation is available on this page. For example, you may want to list all the hosted services that are declared in your subscription.
If you read the documentation, you will see that you just have to execute a GET http request on the following URI:
https://management.core.windows.net/<subscription-id>/services/hostedservices
Where is your subscription id…
Each http request to the management API should be authenticated with the client certificate, so you just have to retrieve the certificate from store and append it to the client certificates collection of the web request :
var certificate = GetManagementCertificateFromStore("<thumbprint>");
HttpWebRequest request = (HttpWebRequest)HttpWebRequest.Create([https://management.core.windows.net/<subscription-id>/services/hostedservices](https://management.core.windows.net/<subscription-id>/services/hostedservices));
request.ClientCertificates.Add(certificate);
You also have to add some headers to make the http request valid :
-
x-ms-version : represents the version of the management API you want to use. For example the last version is 2013-03-01
-
ContentType, most of the time application/xml
request.Headers.Add("x-ms-version", "2013-03-01");
request.ContentType = "application/xml";
And finally you can execute the web request and wait for the response !
Fourth step : handle the http response
Depending on the operation you have executed the response status code is not the same. In the example of listing hosted services, success will be represented by a 200 (OK) http status code. If you had choose to create a new deployment you have been received an http CREATED status code. The expected status code is given on the description of each http operation in the MSDN documentation.
If the request was not well formed, you will received a BAD REQUEST http status code.
In both success or error cases, the response content is described as an XML document. The response body is also described in the description of each operation on MSDN. For the listing hosted services example, the response body will look like the following :
<?xml version="1.0" encoding="utf-8"?>
<HostedServices xmlns=`http://schemas.microsoft.com/windowsazure`>
<HostedService>
<Url>hosted-service-address</Url>
<ServiceName>hosted-service-name</ServiceName>
<HostedServiceProperties>
<Description>description</Description>
<AffinityGroup>affinity-group</AffinityGroup>
<Location>service-location</Location>
<Label>label</Label>
<Status>status</Status>
<DateCreated>date-created</DateCreated>
<DateLastModified>date-modified</DateLastModified>
<ExtendedProperties>
<ExtendedProperty>
<Name>property-name</Name>
<Value>property-value</Value>
</ExtendedProperty>
</ExtendedProperties>
</HostedServiceProperties>
</HostedService>
</HostedServices>
In case you get an error status code, the response body will look like the following :
<?xml version="1.0" encoding="utf-8"?>
<Error>
<Code>string-code</Code>
<Message>detailed-error-message</Message>
</Error>
You can find a list of all error codes you may received on this page.
Conclusion
You are now able to use the REST APIs to manage your Windows Azure subscriptions.
In the next post, I will discuss about more advanced operations like creating deployments or hosted services.
Hope this helps ! 
Julien
read more
27 May 2013 in
ASP.NET Web API
|
Microsoft Azure
|
Windows Phone
One of the best thing when working with the Windows Azure platform is that all APIs are accessible through REST http requests. For one Windows Phone app I’m currently developing I had to upload video file in a blob container. To do that, I choose to use the shared access signatures.
Windows Azure storage accounts are secured with a key that is generated when the account is created. Even if it is possible to regenerate this key at any time, it gives to anyone who owns it admin rights on the storage account. The purpose of using shared access signatures is to allow read, write, delete or list operations on a blob reference or a blob container. Shared access signatures are built from shared access policies that allows to control which kind of permission is given and the expiration time of the signature. For example, you can create an shared access signature that allows any user that owns it to upload blobs in a given container during 20 minutes.
First, I have developed a web API service that is consumed by my Windows Phone application to get a shared access signature to a blob container. To generate the signature, you can use the traditional storage APIs from the Windows Azure SDK (2.0 in this case) :
public class SharedAccessSignatureController : ApiController
{
private const string cloudStorageAccountConnectionString = "<your storage connection string>";

public HttpResponseMessage Get()
{
CloudStorageAccount account = CloudStorageAccount.Parse(cloudStorageAccountConnectionString);
CloudBlobClient client = account.CreateCloudBlobClient();
CloudBlobContainer container = client.GetContainerReference("container");
container.CreateIfNotExists();

SharedAccessBlobPolicy policy = new SharedAccessBlobPolicy()
{
Permissions = SharedAccessBlobPermissions.Read|SharedAccessBlobPermissions.Write,
SharedAccessStartTime = DateTime.UtcNow.AddMinutes(-5),
SharedAccessExpiryTime = DateTime.UtcNow.AddMinutes(30)
};

string sharedAccessSignature = container.GetSharedAccessSignature(policy);
string containerWithSasUri = string.Format("{0}{1}", container.Uri, sharedAccessSignature);

return Request.CreateResponse(HttpStatusCode.OK, new { ContainerWithSasUrl = containerWithSasUri });
}
}
In the previous sample, I get a reference to a blob container using the azure storage sdk. After that I can get a shared access signature for read and write operations. The signature is valid during the next 30 minutes.
Now I can easily get the blob container URI with shared access signature from my Windows Phone application :
private async Task<string> GetContainerWithSasUri()
{
var httpClient = new HttpClient();
var requestUrl = "http://mywebapi.com/api/SharedAccessSignature";
var response = await httpClient.GetAsync(requestUrl);
if (response.StatusCode == HttpStatusCode.OK)
{
return await response.Content.ReadAsStringAsync();
}

return string.Empty;
}
NB : the HttpClient is now available for Windows Phone 8 applications. You can find it with the Nuget packages manager console, in Visual Studio 2012.
Now that I have the shared access signature in the Windows Phone application I can use it to upload the video file in the container, using the HttpClient and the Windows Azure storage REST APIs.
There are two steps to upload a block blob in a container :
- Upload each block with an id
- Commit the block ids to finalize the upload and consolidate the file in the storage
public async Task<string> UploadVideoAsync(string fileName)
{
//get the container uri with SAS
string containerWithSasUri = GetContainerWithSasUri().Replace("\"", "");
//get the query string
string query = new Uri(containerWithSasUri).Query;
//extract the blob container uri, without the shared access signature
string blobContainerUri = containerWithSasUri.Substring(0, containerWithSasUri.Length - query.Length);

//create a list to store block id's
List<string> blocks = new List<string>();

//file block size
int blockSize = 4 * 1024;

//create a buffer
byte[] fileBuffer = new byte[blockSize];

//blobName
string blobName = Guid.NewGuid().ToString();

//create http client
HttpClient httpClient = new HttpClient();

//open the file from iso store
using (var isf = IsolatedStorageFile.GetUserStoreForApplication())
{
if (!isf.FileExists(fileName))
return "";

//open the stream
using (var fileStream = isf.OpenFile(fileName, FileMode.Open, FileAccess.Read))
{
int blockIndex = 0;

//while end of file is not reached
while (fileStream.Read(fileBuffer, 0, blockSize) != 0)
{
//add the block id in the list
string blockId = blockIndex.ToString("d4");
blocks.Add(blockId);

//create the URL to put the file block
string requestUrl = string.Format("{0}/{1}{2}&comp=block&blockid={3}", blobContainerUri, blobName, query,
Convert.ToBase64String(Encoding.UTF8.GetBytes(blockId)));

//PUT the block async
var response = await httpClient.PutAsync(requestUrl, new ByteArrayContent(fileBuffer));

//if the block was not created, return empty string
if (response.StatusCode != HttpStatusCode.Created)
return "";
}
}
}

//consolidate the block list
string xmlBody = @"<?xml version=""1.0"" encoding=""utf-8"" ?><BlockList>{0}</BlockList>";
StringBuilder xmlBodyBuilder = new StringBuilder();
foreach (string blockId in blocks)
{
xmlBodyBuilder.AppendFormat("<Latest>{0}</Latest>", Convert.ToBase64String(Encoding.UTF8.GetBytes(blockId)));
}

xmlBody = string.Format(xmlBody, xmlBodyBuilder.ToString());

//commit the block list
string commitUrl = string.Format("{0}/{1}{2}&comp=blockList", blobContainerUri, blobName, query);
var commitResponse = await httpClient.PutAsync(commitUrl, new ByteArrayContent(Encoding.UTF8.GetBytes(xmlBody)));

if (commitResponse.StatusCode != HttpStatusCode.Created)
return "";

return string.Format("{0}/{1}", blobContainerUri, blobName);
}
This code snippet allows to upload a file from the isolated storage to a blob container and get its URI once the upload is done. As you can see, a distinct URL is used to PUT each blob. After that all file blocks have been upload, an XML payload is built to regroup all the block ids. Next, this payload is also put to commit the file upload.
Hope this helps 
Julien
read more
14 May 2013 in
Microsoft Azure
Par défaut, il n’est pas possible d’exécuter une librairie en 32 bit dans un web rôle Windows Azure, tout simplement parce que la configuration de l’application pool IIS l’interdit. Cependant, il est possible de modifier cette configuration afin de rendre ce genre de scénario possible !
Pour cela, il faut exécuter un script de configuration de IIS, au sein d’une Startup Task. Les Startup Task Windows Azure permettent d’exécuter un script ou un programme (par exemple un installateur msi) avant que le rôle n’ait vraiment démarrer. Cela permet donc de préparer votre environnement, à chaque démarrage d’une instance d’un rôle.
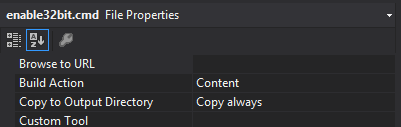
Dans votre Web Role, commencez par ajouter un script enable32bit.cmd avec la commande ci-dessous :
%windir%\system32\inetsrv\appcmd set config -section:applicationPools -applicationPoolDefaults.enable32BitAppOnWin64:true
Il est important de définir sa Build Action à Content et sa propriété Copy to output directory à Copy always :
Enfin, il faut éditer le fichier de définition de la configuration des rôles de votre projet Cloud, le fichier ServiceDefinition.csdef et d’ajouter un noeud StartupTask sous le Web Role ciblé :
<Startup>
<Task commandLine="enable32bit.cmd" executionContext="elevated" taskType="simple" />
</Startup>
Le fait d’indiquer un executionContext elevated indique que l’on souhaite exécuter le script en mode de privilèges élevés.
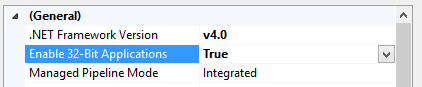
Désormais, lorsque vous allez publier votre rôle sur Azure, le script sera automatiquement exécuté et vous pourrez exécuter du code 32 bit dans votre applicatif. Si vous vous connectez en bureau à distance à votre instance, vous pourrez d’ailleurs constater dans la console de gestion IIS, propriétés du pool applicatif, que le paramètre Enable 32-Bit Applications est à True :
Enjoy 
Julien
read more
10 Apr 2013 in
ASP.NET MVC
Depuis ASP.NET 4, il existe une fonctionnalité assez intéressante : la possibilité d’exécuter du code au chargement de l’app domain dans lequel s’exécute votre application, c’est à dire avant même que le code de votre application soit chargé.
On parle du pré-démarrage de l’application. Ce mécanisme est très simple à mettre en place et peut être réalisé dans n’importe quel assembly chargé dans l’app domain de votre application :
- Création d’une classe statique PreApplicationStart (par exemple)
- Création d’une méthode statique OnStart (par exemple)
- Ajout d’un attribut d’assembly pour indiquer l’emplacement de cette classe
Cela peut être très utile, notamment pour enregistrer des modules http, par exemple !
Vous obtenez donc un code de ce genre là :
public static class PreApplicationStart
{
public static void OnStart()
{
//code de pré-démarrage
}
}
Ensuite, il suffit de pointer cette classe depuis le fichier Assembly.cs du projet dans lequel elle est définie :
[assembly: PreApplicationStartMethod(typeof(PreApplicationStart), "OnStart")]
Il ne reste qu’à référencer la librairie dans le projet web, et la méthode OnStart sera automatiquement appelée lors du pré-démarrage.
Enjoy 
Julien
read more